
The cluster was built on OpenStack private cloud owned by a Swiss organization Switch.
The Hadoop distributor was Hortonworks, except for Spark and Zeppelin, who were Apache’s.
Potential users
Since the project owner was an organization supporting educational entities in Switzerland, the potential users were researchers, scientists, students…
I had the luxury of having almost unlimited resources on the infrastructure so I have built 5 Hadoop clusters – 4 were Hortonworks Hadoop clusters, one was Apache Hadoop cluster. Out of the 4, one was the Work environment which was exposed to the end users. And this is the cluster that is described in detail in this post.
Keep in mind that I was working on my own on this development – which meant administering and upgrading 5 clusters and doing data science at the same time. In order to make it work, I had to use the YARN inside me and distribute the limited resources effectively.
Initial resources
Keeping in mind the point of distributed systems is scalability, I have defined the initial cluster with the following capabilities.
6 instances with corresponding details:
- Ambari Server
- NameNode
- DataNode (3)
- Client
| Instance | RAM | VCPU | Default disk size | Volume No. | Volume Size | Security group |
|---|---|---|---|---|---|---|
| Ambari | 8GB | 8 VCPU | 20GB | None | None | sg-ambari |
| NameNode | 32GB | 8 VCPU | 20GB | 1 | 200GB | sg-namenode |
| DataNode (3) | 32GB | 8 VCPU | 20GB | 3 | 200GB | sg-datanode |
| Client | 16GB | 16 VCPU | 20GB | 1 | 500GB | sg-client |
Note: There were three DataNodes in the initial cluster.
Characteristics of the cluster
The initial cluster had 1.7 TB HDFS, replication factor was 3, block size was the default 128MB. Rack awareness was not set in the initial cluster and the queue was the default.
On the YARN side, I have made some changes and had 84GB RAM (3 x 32GM = 96GB RAM. 4GB per DataNode was left for services on the instance -> 96GB – 12GB = 84GB) as maximum amount of RAM resources for the cluster – the default values by Apache (Hortonworks?) are quite more conservative.
In the cluster building process the versions were Ambari 2.1 and HDP 2.3. When Ambari 2.2 and HDP 2.4 were available, the cluster was upgraded.
Ambari
Ambari had a server for itself, the database for collecting statistics was MySql. The idea was always to migrate the Ambari Server if needed. The migration to new Ambari server is easy so I could afford to start small for this service.
The Ambari Views was enabled for the users who wanted to upload the files to the HDFS manually. Hive was also available through this service and I on my one of my test environments, I have even embedded Zeppelin in Ambari Views. Though, on the Work cluster, Zeppelin was offered only as an independent service on the Client.
All the ports for Ambari to properly work were in the sg-ambari security group.
NameNode
The initial plan with the NameNode was to run all the services on it except Spark and Zeppelin. When the resources would expand beyond the instance’s capabilities, some services would be moved to a new instance, or unused services would be stopped (experience showed Hive had little popularity among the academia). Using Ambari, migrating services is an easy process, I could afford to have all services running on one NameNode. Only cluster administrator had access to this instance. With other words, client tools were not installed on this instance.
All the ports for the NameNode to properly work were in the sg-namenode security group.
DataNode
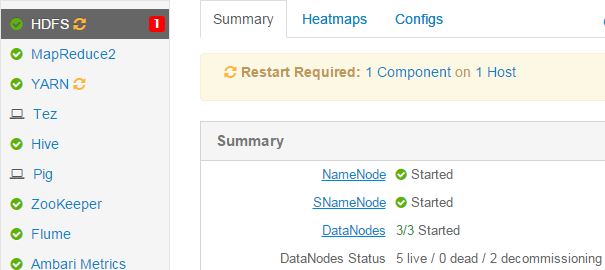
I started with 3 DataNodes, which offered 1.7TB of storage on the HDFS. The DataNodes were also used as Workers for Spark and Supervisors for Storm. The users had no access to the DataNodes directly – no client was installed here. This would change according to the needs so that some jobs could access data directly locally.
All the ports for the DataNodes to properly work were in the sg-datanode security group.
Client
The client was users’ window to the cluster. Spark 2.0 (before Summer 2016 it was Spark 1.6) was offered as the computational engine – only one. One reason was also easier administration and optimizatoin from my side.
The users could use the command line interface (CLI), RStudio or Zeppelin. Ambari Views as well, but that was running on Ambari instance. More advanced users went with the CLI, users who wanted to learn Spark were using Zeppelin.
Client for Storm was also installed on this instance. Due to more complex programming (in Java), all the Topologies were handled by me, the users were defining requirements and using the data stored by the Storm.
All the ports for the Client to properly work were in the sg-datanode security group.
See below for page 2.
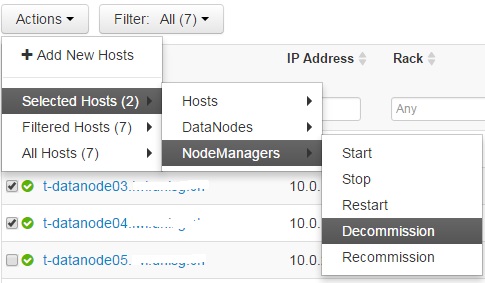
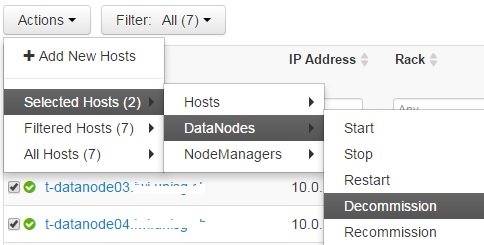

 Repeat this for every Datanode.Click OK on the confirmation window.


 Click next.
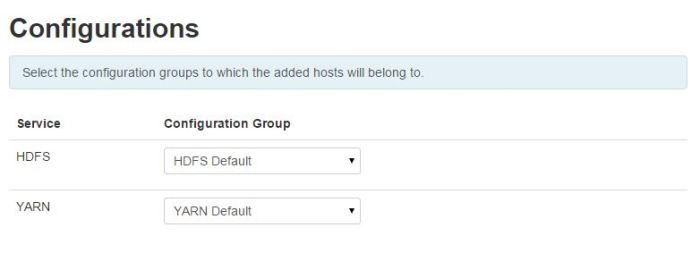 Click Next.
 Click Next.
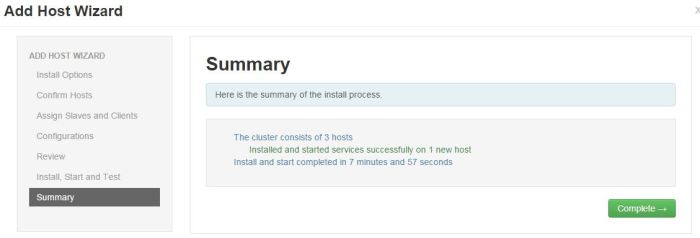 Click on Complete and list of installed Hosts will load.