Upgrading HDP 2.5 to 2.6

This blog post explains how an express upgrade from HDP 2.5 to HDP 2.6 has been done.

I have a HDP 2.5 cluster on AWS, Ubuntu 14.04 is running on all instances. My metadata database of choice is MySql 5.6.

Prior to upgrading HDP, Ambari has to be upgraded to 2.5. An upgrade from Ambari 2.4 to 2.5 is described here.

Backup databases

Do a backup of all databases that are storing metadata for services installed in HDP.

Example of backing up Hive metadata:
On the server where Hive metastore database is, create a backup folder

mkdir /home/ubuntu/hive-backup

Dump the database into a file (enter password when prompted):

mysqldump -u hive -p hive > /home/ubuntu/hive-backup/hive.mysql

Backup namenode files

Create backup directory

mkdir/home/ubuntu/hdp25-backup

Backup a complete block map of the file system

sudo -u hdfs hdfs fsck / -files -blocks -locations > /home/ubuntu/hdp25-backup/dfs-old-fsck-1.log

Create a list of all the DataNodes in the cluster

sudo -u hdfs hdfs dfsadmin -report > /home/ubuntu/hdp25-backup/dfs-old-report-1.log

Capture the complete namespace of the file system

sudo -u hdfs hdfs dfs -ls -R / > /home/ubuntu/hdp25-backup/dfs-old-lsr-1.log

Go into safemode

sudo -u hdfs hdfs dfsadmin -safemode enter

Output

Safe mode is ON

Save namespace

sudo -u hdfs hdfs dfsadmin -saveNamespace

Output

Save namespace successful

Copy the checkpoint files located in ${dfs.namenode.name.dir}/current into a backup directory

sudo cp /hadoop/hdfs/namenode/current/fsimage_0000000000000485884 hdp25-backup/
sudo cp /hadoop/hdfs/namenode/current/fsimage_0000000000000485884.md5 hdp25-backup/

Store the layoutVersion for the NameNode

sudo cp /hadoop/hdfs/namenode/current/VERSION hdp25-backup/

Take the NameNode out of Safe Mode

sudo -u hdfs hdfs dfsadmin -safemode leave

Finalize any prior HDFS upgrade

sudo -u hdfs hdfs dfsadmin -finalizeUpgrade

Output

Finalize upgrade successful

Upgrading Ambari 2.4 to 2.5

This post describes how an upgrade from Ambari 2.4.1.0 to 2.5 has been done. The reason for that is to be able to further upgrade HDP to 2.6. Upgrade of HDP from 2.5 to 2.6 is described here.

Ambari Server is installed on Ubuntu 14.04. The same OS is used across the whole HDP cluster.

The following services are upgraded using this blog post:

  • Ambari Server
  • Ambari Agent
  • Ambari Infra
  • Ambari Metrics
  • Ambari Collector
  • Grafana

Backup

It is important to do a database backup of the Ambari database. Metadata for my Ambari is stored in MySql database.

Create a directory for backup

mkdir /home/ubuntu/ambari24-backup

Backup the database (enter password when prompted)

mysqldump -u ambari -p ambari_db > /home/ubuntu/ambari24-backup/ambari.mysql

Make a safe copy of the Ambari Server configuration file

sudo cp /etc/ambari-server/conf/ambari.properties ambari24-backup/

Prepare for installation of Ambari Agent and Server

Stop Ambari Metrics from the Ambari Web UI

Stop Ambari Server on Ambari Server instance

sudo ambari-server stop

Stop all Ambari Agents on all instances in the cluster where it is running

sudo ambari-agent stop

On all instances running Ambari Server or Ambari Agent do the following

sudo mv /etc/apt/sources.list.d/ambari.list db-backups/
sudo wget -nv http://public-repo-1.hortonworks.com/ambari/ubuntu14/2.x/updates/2.5.0.3/ambari.list -O /etc/apt/sources.list.d/ambari.list

Upgrade Ambari Server

sudo apt-get clean all
sudo apt-get update -y
sudo apt-cache show ambari-server | grep Version

The last command should output something like this

Version: 2.5.0.3-7
Version: 2.4.1.0-22

This means version 2.5 is available, Ambari Server can be installed

Install Ambari Server

sudo apt-get install ambari-server

Some lines from the output

The following packages will be upgraded:
  ambari-server

Unpacking ambari-server (2.5.0.3-7) over (2.4.1.0-22) ...

Setting up ambari-server (2.5.0.3-7) ...

Confirm that there is only one ambari server jar file

ll /usr/lib/ambari-server/ambari-server*jar

Output

-rw-r--r-- 1 root root 5806966 Apr  2 23:33 /usr/lib/ambari-server/ambari-server-2.5.0.3.7.jar

Install Ambari Agent

On each host running Ambari agent

sudo apt-get update
sudo apt-get install ambari-agent

Check if the Ambari agent install was a success

dpkg -l ambari-agent

Output from one node

Desired=Unknown/Install/Remove/Purge/Hold
| Status=Not/Inst/Conf-files/Unpacked/halF-conf/Half-inst/trig-aWait/Trig-pend
|/ Err?=(none)/Reinst-required (Status,Err: uppercase=bad)
||/ Name                         Version        Architecture    Description
+++-============================-==============-===============-=================
ii  ambari-agent                 2.5.0.3-7      amd64           Ambari Agent

Upgrade Ambari DB schema

On Ambari Server instance, run the following command

sudo ambari-server upgrade

The following question shows up. The backup has been done at the beginning. Type y and press Enter.

Ambari Server configured for MySQL. Confirm you have made a backup of the Ambari Server database [y/n] (y)?

Output

INFO: Upgrading database schema
INFO: Return code from schema upgrade command, retcode = 0
INFO: Schema upgrade completed
Adjusting ambari-server permissions and ownership...
Ambari Server 'upgrade' completed successfully.

Start the services

Start Ambari Server

sudo ambari-server start

Start Ambari Agent on all instances where it is installed

sudo ambari-agent start

Post-installation tasks

Hive and Oozie (which I have installed in HDP) are using MySql, so I have to put the jar file in place

sudo ambari-server setup --jdbc-db=mysql --jdbc-driver=/usr/share/java/mysql-connector-java.jar

Upgrading Hortonworks Data Platform from 2.3.4 to 2.4.0

This post describes how to do an Express Upgrade of Hortonworks Data Platform (HDP) with Ambari.

Ugrading HDP begins with upgrading Ambari, Ambari Metrics and, not mandatory but recommended, adding Grafana.

When this is in place and all services are up and running, Upgrading HDP to 2.4 can begin.

Backup

File backup

Creating a backup of all the important files and databases is the first step. The following steps are done on the NameNode.

Create backup directory

mkdir /home/ubuntu/HDP-2.3.4-backup

Run HDFS filesystem check and save the ouptut to a file in the backup directory

sudo -u hdfs hdfs fsck / -files -blocks -locations > /home/ubuntu/HDP-2.3.4-backup/dfs-old-fsck-1.log

Gather basic filesystem information and statistics in a report

sudo -u hdfs hdfs dfsadmin -report > /home/ubuntu/HDP-2.3.4-backup/dfs-old-report-1.log

List the whole HDFS directory and save the ouptut to a file

sudo -u hdfs hdfs dfs -ls -R > /home/ubuntu/HDP-2.3.4-backup/dfs-old-lsr-1.log

Enter Safemode, mandatory for next steps

sudo -u hdfs hdfs dfsadmin -safemode enter

Save current namespace and reset edits log

sudo -u hdfs hdfs dfsadmin -saveNamespace

Make a copy of the VERSION file (here is HDP’s default directoy, file VERSION should reside in ${dfs.namenode.name.dir}/current)

sudo cp /hadoop/hdfs/namenode/current/VERSION /home/ubuntu/HDP-2.3.4-backup/

Leave Safemode

sudo -u hdfs hdfs dfsadmin -safemode leave

Finalize upgrade of HDFS
According to the Apache Hadoop documentation:

“Datanodes delete their previous version working directories, followed by Namenode doing the same. This completes the upgrade process.”

sudo -u hdfs hdfs dfsadmin -finalizeUpgrade

Database backup

My cluster has MySql database that is used by Hive and Ranger. That means I have 3 databases to back up: hive, ranger and ranger_audit (since I am storing audit data in a database).

hive

DAT=`date +%Y%m%d_%H%M%S`
mysqldump -u root -proot hive > /home/ubuntu/HDP-2.3.4-backup/hive_$DAT.sql

This is done beforehand so that you can check the checkbox and move on in the process of upgrade

Hive upgrade warning

Ranger

This is done beforehand so that you can check the checkbox and move on in the process of upgrade

Ranger Admin warning

ranger_admin

DAT=`date +%Y%m%d_%H%M%S`
mysqldump -u root -proot ranger > /home/ubuntu/HDP-2.3.4-backup/ranger_$DAT.sql

ranger_audit

DAT=`date +%Y%m%d_%H%M%S`
mysqldump -u root -proot ranger_audit > /home/ubuntu/HDP-2.3.4-backup/ranger_audit_$DAT.sql


Content of backup folder

/home/ubuntu/HDP-2.3.4-backup/
├── dfs-old-fsck-1.log
├── dfs-old-lsr-1.log
├── dfs-old-report-1.log
├── hive_20160804_074811.sql
├── ranger_20160804_074907.sql
├── ranger_audit_20160804_074914.sql
└── VERSION

Click below on Page 2 to continue with the process.

Ambari Upgrade 2: Install Grafana

How Ambari is upgraded to version 2.2.2.0 is described in Ambari Upgrade 1. The upgrade is not complete at this stage yet; a lot more is offered from the visualization perspective. Grafana is offered from Ambari 2.2.2. as a component of Ambari Metrics.

Apache Grafana is a visualization tool for time data series.

Hortonworks’ documentation on this can be obtained here.

Install Grafana

  1. Add the METRICS_GRAFANA component to Ambari
    curl -u admin:admin -H "X-Requested-By:ambari" -i -X POST http://ambari-server:8080/api/v1/clusters/cluster_name/services/AMBARI_METRICS/components/METRICS_GRAFANA

    If the command was a success the message HTTP/1.1 201 Created should appear.

  2. Add METRICS_GRAFANA to a host
    curl -u admin:admin -H "X-Requested-By:ambari" -i -X POST -d '{"host_components":[{"HostRoles":{"component_name":"METRICS_GRAFANA"}}]}' http://ambari-server:8080/api/v1/clusters/cluster_name/hosts?Hosts/host_name=grafana-server-fqdn
    

    If the command was a success the message HTTP/1.1 201 Created should appear.
    If the message is HTTP/1.1 200 OK then something went wrong, perhaps the server where Grafana is going to be installed was not properly defined – use FQDN.

  3. In Ambari Metrics, under Configs, under tab General Grafana Admin Password is missing.
    ambari grafana config uname passwordEnter a password and save the changes.
  4. In Ambari, under Services -> Ambari Metrics you will see status on Grafana
    ambari grafana status
  5. In Ambari, under Hosts -> grafana-server (or the name where Grafana resides), you find the Grafana component ready for install. Click on the Install Prending
    grafana install pending
  6. And click on Re-Install
    grafana reinstall
  7. Install Status should be a success
    grafana install status success
    Grafana Web UI should now be visible at the following address: grafana-server:3000. If everything went well, you should just refresh the website and see the Ambari Dashboards.
    Signing in the Grafana gives extra options, among others also the Data Sources. AMBARI_METRICS is already added.


Manually configuring Data Source

Sign in.
Go to Grafana Web Ui and define an Ambari Metrics datasource
Data sources -> Add new
Under Url, type the grafana-server url address.
grafana define datasourceSave and Test the connection.

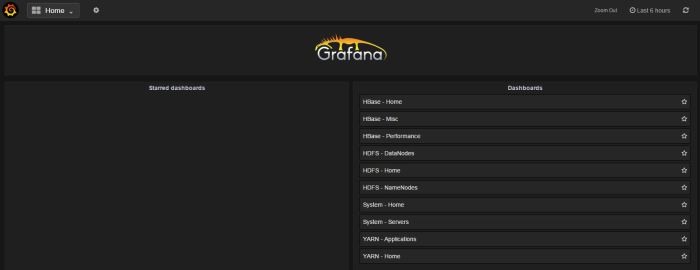
When you go in Grafana again, you should be able to see the list of default Ambari dashboards.

Grafana


Ambari Upgrade 1: Upgrading Hortonworks Ambari from 2.1 to 2.2

Introduction

This post explains how to upgrade from Ambari 2.1 to either version 2.2.1.1 or 2.2.2.0.

Im using an external database MySql as Ambari database. My operating system is Ubuntu 14.04 Trusty. Hive service is using external database – MySql (important information for later).

The cluster does NOT have the following services installed:

  • Ranger
  • Storm
  • Ganglia
  • Nagios

The upgraded cluster does not use LDAP, nor Active Directory.

If you have any of the above mentioned services, check this link to learn how to handle them in the upgrade process.

Backup

The following steps are done on the Ambari server, unless explicity mentioned otherwise.

  1. Create a folder for backup files on all nodes in the cluster.
    mkdir /home/ubuntu/ambari-backup
  2. Backup the Ambari MySql database.
    DAT=`date +%Y%m%d_%H%M%S`
    mysqldump -u root -proot ambari_db > /home/ubuntu/ambari-backup/ambari_db_$DAT.sql
  3. Backup the ambari.properties file.
    sudo cp /etc/ambari-server/conf/ambari.properties /home/ubuntu/ambari-backup

Upgrade

  1. Make sure you have Java 1.7+ on the Ambari server.
  2. Stop Ambari Metrics from the Ambari web UI.
  3. Stop Ambari server
    sudo ambari-server stop
  4. Stop all Ambari agents on all nodes.
    sudo ambari-agent stop
  5. Remove old repository file ambari.list from all nodes. Different Linux flavours might have different file name check here, page 6.
    sudo mv /etc/apt/sources.list.d/ambari.list /home/ubuntu/ambari-backup
  6. Download new repository file on all nodes.
    Ambari 2.2.1 for Ubuntu 14:

    sudo wget -nv http://public-repo-1.hortonworks.com/ambari/ubuntu14/2.x/updates/2.2.1.1/ambari.list -O /etc/apt/sources.list.d/ambari.list

    Ambari 2.2.2 for Ubuntu 14:

    sudo wget -nv http://public-repo-1.hortonworks.com/ambari/ubuntu14/2.x/updates/2.2.2.0/ambari.list -O /etc/apt/sources.list.d/ambari.list
  7. Update Ubuntu packages and check version.
    sudo apt-get clean all
    sudo apt-get update
    sudo apt-cache show ambari-server | grep Version

    If you are installing to 2.2.1, you should see the following output:
    Version: 2.2.1.1-70
    If you are installing to 2.2.2, you should see the following output:
    Version: 2.2.2.0-460

  8. Install Ambari server on the node dedicated for Ambari server.
    sudo apt-get install ambari-server

    Confirm that there is only one ambari-server*.jar file in /usr/lib/ambari-server.
    Jar files related to upgrade 2.2.1:

    ambari-metrics-common-2.2.1.1.70.jar
    ambari-server-2.2.1.1.70.jar
    ambari-views-2.2.1.1.70.jar

    Jar files related to upgrade 2.2.2:

    ambari-metrics-common-2.2.2.0.460.jar
    ambari-server-2.2.2.0.460.jar
    ambari-views-2.2.2.0.460.jar

  9. Install Ambari agents on all nodes in the cluster.
    sudo apt-get update -y && sudo apt-get install ambari-agent
  10. Upgrade Ambari database.
    sudo ambari-server upgrade
  11. The following question show up: “Ambari Server configured for MySQL. Confirm you have made a backup of the Ambari Server database [y/n] (y)?”
    Press “y”, since that was done in the backup process.When the installation is completed, the following output concludes the installation process:

    Ambari Server ‘upgrade’ completed successfully.

  12. Start Ambari server.
    sudo ambari-server start
  13. On all nodes where Ambari agent is installed, start the agent.
    sudo ambari-agent start
  14. Hive in the cluster is using external database – MySql, so this step is mandatory. Reinstall mysql connector file
    sudo ambari-server setup --jdbc-db=mysql --jdbc-driver=/usr/share/java/mysql-connector-java.jar
  15. Log in to the upgraded Ambari (same URL, same port, same username and password)
  16. Restart all services in Ambari

Ambari Metrics upgrade

  1. Stop all Ambari Metrics services in Ambari.
  2. On every node in the cluster, where Metrics Monitor is installed, execute the following commands.
    sudo apt-get clean all
    sudo apt-get update
    sudo apt-get install ambari-metrics-assembly
  3. On every node in the cluster, where Metrics Collector is installed, execute the following commands (yes, the command is the same as in previous step).
    sudo apt-get install ambari-metrics-assembly
  4. Start Ambari Metrics services in Ambari.

Warning!

After the upgrade, it is possible to run into the following message when accessing Ambari Web UI.

Ambari post upgrade message in browser

Ctrl+Shift+R solves the problem. The text in the message is quite descriptive and explains why this message is showing.


Next step is installing Grafana. This is covered in post Ambari Upgrade 2.

Additional links

The link takes you to the Hortonworks Ambari 2.2.1.1 upgrade document.
The link takes you to the Hortonworks Ambari 2.2.2.0 upgrade document.