I have Ubuntu 14.04 Trusty and a multinode Hadoop cluster. Hadoop distribution is Hortonworks 2.3.4. Spark is installed through Ambari Web UI and running version is 1.5.2 (upgraded to 1.6.0).
I am going to explain how I built and set up Apache Zeppelin 0.6.0 on Spark 1.5.2 and 1.6.0
Prerequisities
Non root account
Apache Zeppelin creators recommend not to use root account. For this service, I have created a new user zeppelin.
Java 7
Zeppelin uses Java 7. My system has Java 8, so I have installed Java 7 just for Zeppelin. Installation is in the following directory done as user zeppelin.
/home/zeppelin/prerequisities/jdk1.7.0_79
JAVA_HOME is added to the user’s bashrc.
export JAVA_HOME=/home/zeppelin/prerequisities/jdk1.7.0_79
Zeppelin log directory
Create zeppelin log directory.
sudo mkdir /var/log/zeppelin
Change ownership.
sudo chown zeppelin:zeppelin /var/log/zeppelin
If this is not done, Zeppelin’s log files are written in folder logs right in the current folder.
Clone and Build
Log in as user zeppelin and go to users home directory.
/home/zeppelin
Clone the source code from github.
git clone https://github.com/apache/incubator-zeppelin.git incubator-zeppelin
Zeppelin has a home now.
/home/zeppelin/incubator-zeppelin
Go into Zeppelin home and build Zeppelin
mvn clean package -Pspark-1.5 -Dspark.version=1.5.2 -Dhadoop.version=2.7.1 -Phadoop-2.6 -Pyarn -DskipTests
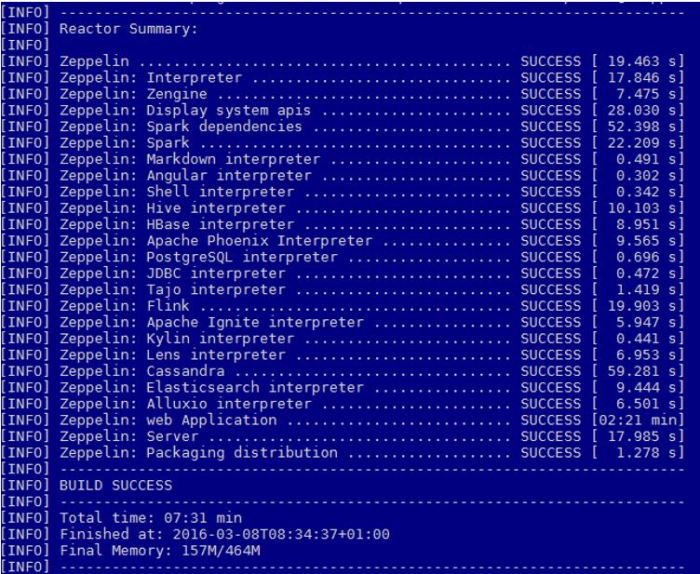
Build order.
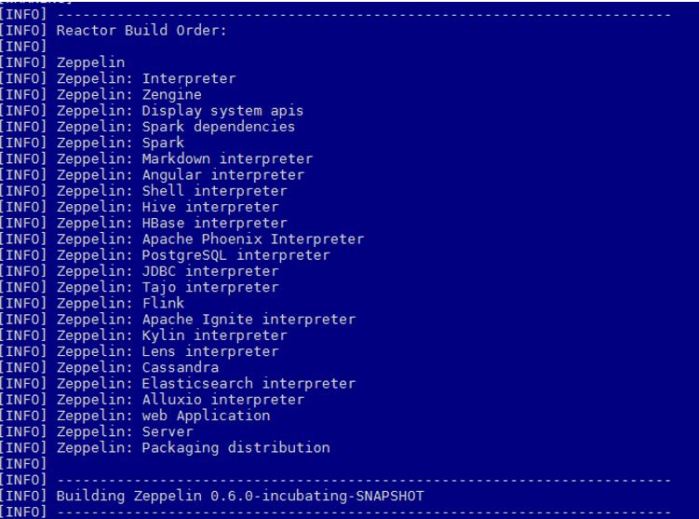
7:31 minutes later, Zeppelin is successfully built.
Note!
If you try with something like the following 2 examples:
mvn clean package -Pspark-1.5 -Dspark.version=1.5.0 -Dhadoop.version=2.7.1 -Phadoop-2.7 -Pyarn -DskipTests
mvn clean package -Pspark-1.5 -Dspark.version=1.5.2 -Dhadoop.version=2.7.1 -Phadoop-2.7 -Pyarn –DskipTests
Build will succeed, but this warning will appear at the bottom of Build report:
[WARNING] The requested profile “hadoop-2.7” could not be activated because it does not exist.
Hadoop version mentioned in the maven execution must be 2.6 even though actual Hadoop version is 2.7.x.
hive-site.xml
Copy hive-site.xml from hive folder (this is done on Hortonworks distribution, users using other distribution should check where the file is located).
sudo cp /etc/hive/conf/hive-site.xml $ZEPPELIN_HOME/conf
Change ownership of the file.
sudo chown zeppelin:zeppelin $ZEPPELIN_HOME/conf/hive-site.xml
zeppelin-env.sh
Go to Zeppelin home and create zeppelin-env.sh by using the template in conf directory.
cp conf/zeppelin-env.sh.template conf/zeppelin-env.sh
Open it and add the following variables:
export JAVA_HOME=/home/zeppelin/prerequisities/jdk1.7.0_79
export HADOOP_CONF_DIR=/etc/hadoop/conf
export ZEPPELIN_JAVA_OPTS="-Dhdp.version=2.3.4.0-3485"
export ZEPPELIN_LOG_DIR=/var/log/zeppelin
The variable in the third line depends on the Hortonworks build. Find your hdp version by executing
hdp-select status hadoop-client
If your Hortonworks version is 2.3.4, the output is:
hadoop-client – 2.3.4.0-3485
Zeppelin daemon
Start Zeppelin from Zeppelin home
./bin/zeppelin-daemon.sh start
Status after starting the daemon:

One can check if service is up:
./bin/zeppelin-daemon.sh status
Status:

Zeppelin can be restarted in the following way:
./bin/zeppelin-daemon.sh restart
Status:

Stopping Zeppelin:
./bin/zeppelin-daemon.sh stop
Status:

Configuring interpreters in Zeppelin
Apache Zeppelin comes with many default interpreters. It is also possible to create your own interpreters. How to configure default Spark and Hive interpreters is covered in this post.


 Click next.
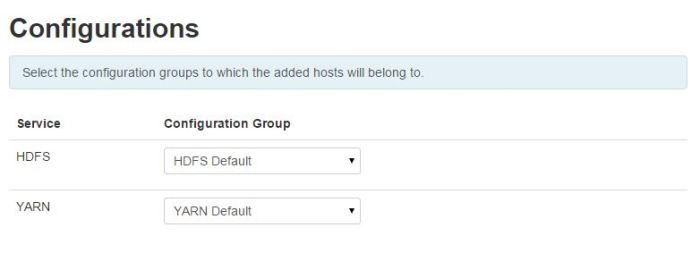 Click Next.
 Click Next.
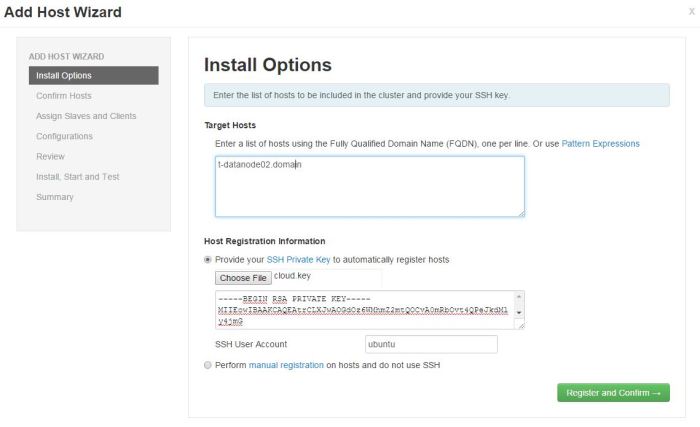
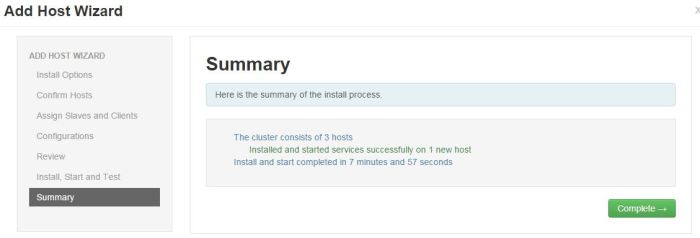 Click on Complete and list of installed Hosts will load.